|
 |
|
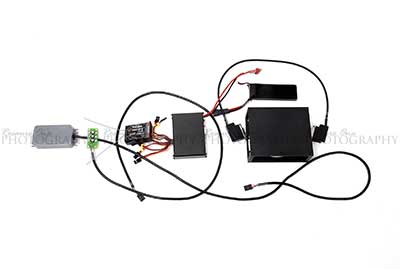
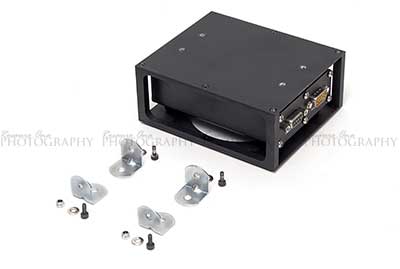
Lay the parts out to
figure out each component's
placement. |
|
| |
|
|
 |
|
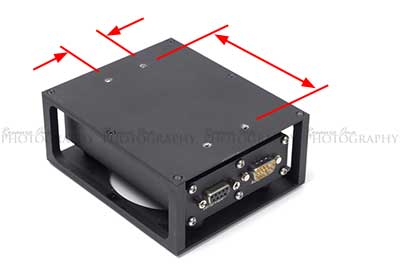
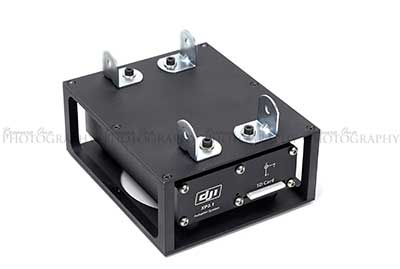
Determine the
orientation of the main controller.
The "DB port" side
must face either front or right side.
During software
configuration enter the main
controller's orientation. This is important for
the IMU sensor. |
|
| |
|
|
 |
|
When deciding the
orientation of the main controller remember the
direction the DB15 cable will have to travel to.
Do not bend it so much that it causes cable fatigue. |
|
| |
|
|
 |
|
Measured the holes
on the helicopter's frame and drilled on the upper
plate of the main controller to match the L-brackets
that will be used.
Be careful when
drilling the holes. Use a "drill-stop" to prevent
damaging the main controller.
Or remove the
controller from the housing. |
|
| |
|
|
 |
|
Initial plans were
to make some elaborate mount. Then realized "What
for?".
Readily available
L-brackets from local hardware stores will do the
job. |
|
| |
|
|
 |
|
L-brackets mounted.
Used long-nose pliers and an open wrench to hold the nuts in place in
between the upper plate and main controller. |
|
| |
|
|
 |
|
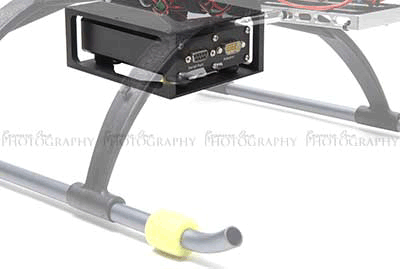
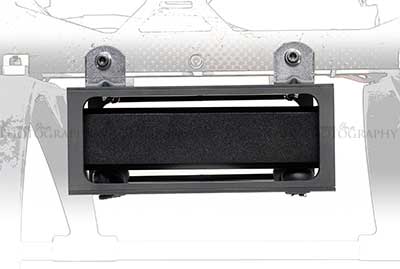
Here's the Main
controller mounted underneath the helicopter's frame.
The KDE bottom
bracket upgrade for the 600 is perfect to securely hold
the main controller.
The existing holes on
the frame were filed larger for the M3 screws. |
|
| |
|
|
 |
|
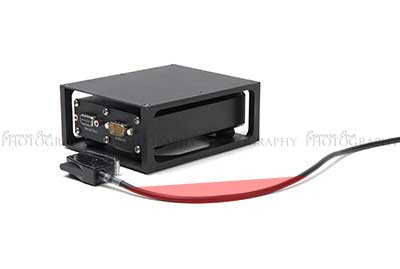
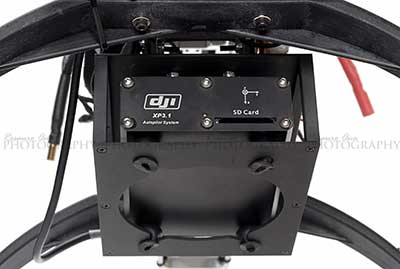
Another view of the
Main controller installed. |
|
| |
|
|
NOTES:
- Do not install the
main controller inverted or in any other orientation.
Make sure it is leveled.
- The main controller
should be installed as close to the center of gravity as
possible. For example right underneath the main
shaft. This will lessen the amount of airflow
caused by the main blades. Remember
the main controller contains the barometric and inertial
sensors.
- The main controller
should be placed away from any heat sources,
electromagnetic sources and servos.
- Remember to leave
enough space where the USB cable plugs into. Access
to this port is required during software configuration
and future adjustment of the main controller. |
|
| |
|
 |
|
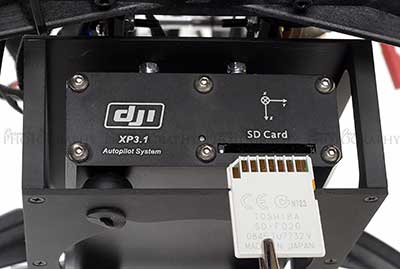
The SD card is
inserted with the contacts on top. |
|
| |
|
 |
|
Make sure the SD card
is seated. To remove push on the card. The
SD card port is spring loaded. |
|
| |
|
 |
|
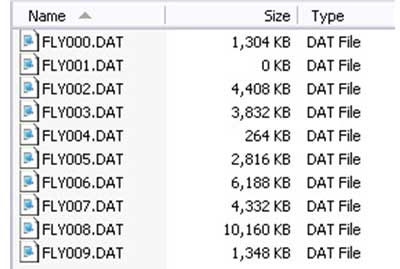
This is file format
of the data recorded in the SD card. |
|
| |
|
 |
|
Don't bother trying
to read it. If some assistance is required with
fine tuning or trouble shooting
then send the file to DJI and they will analyze it for
you. |
|
| |
|
| |
|