|
Working With Layers
As I mentioned previously I'm assuming that you
are working with Photoshop (PSD) layered files from your stitcher software.
Of course these basic steps can be used for other file types.
The output I'm working with is from PTGUI.
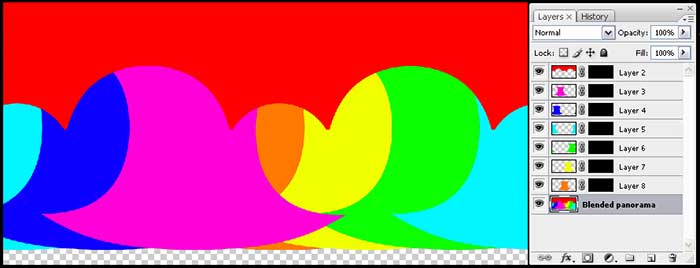
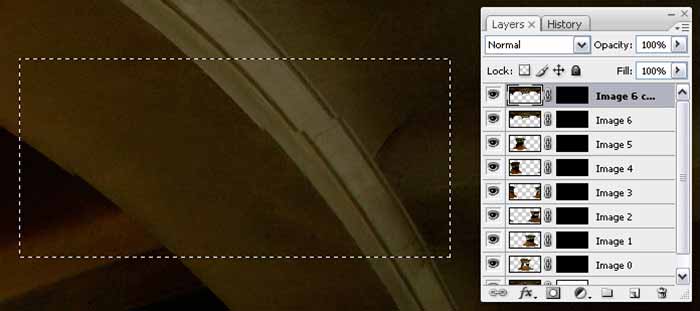
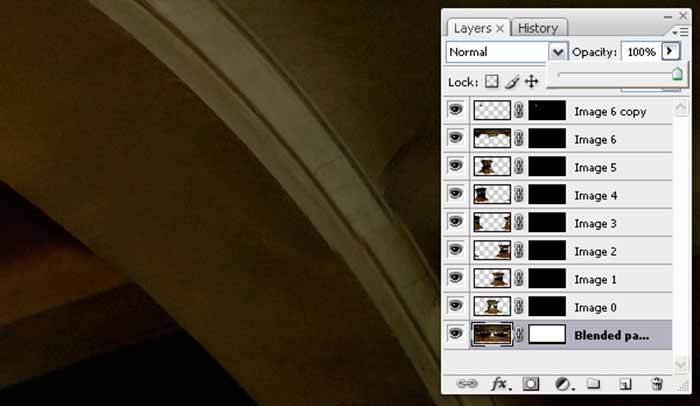
Again, the image below is a
sample of PTGUI's PSD layered output. The layer mask has been
filled in with a solid black making layers 2 - 8 invisible.
Topics covered:
►
Correcting
stitching errors
►
Removing unwanted
details
►
Patching with layers
Let's
begin...
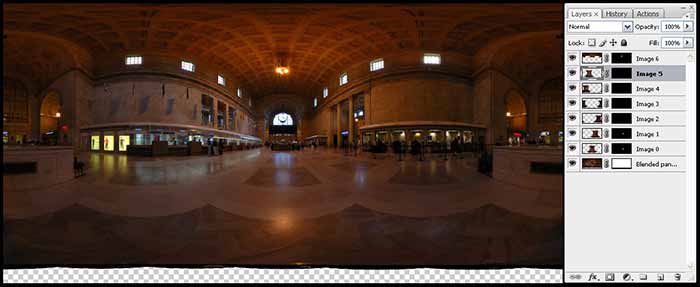
For a
sample pano we'll work with this interior shot of Toronto's Union
Station.
(This
building may no longer exist sometime soon. They're planning
on building a new one) So this picture may become a classic
soon...
This
equirectangular image is the output from PTGUI. A layered and
blended panorama. Again, the black fill on the mask means the
image is hidden.
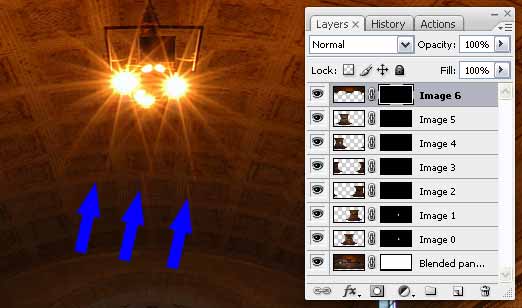
Correcting stitching errors.
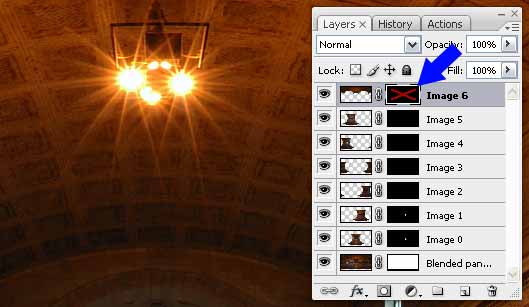
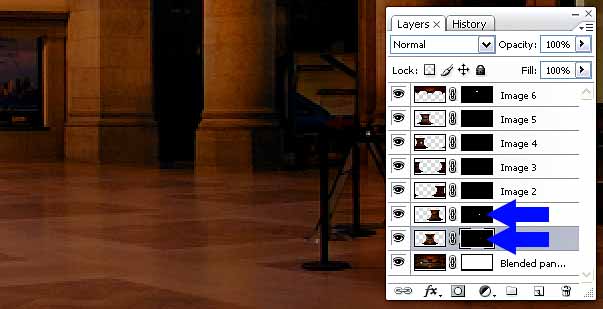
The
image below was zoomed in on the upper portion of the
equirectangular image. The blue arrows shows the rays from the
lights misaligned.
To figure out which layer and
layer mask to choose hold down the SHIFT key and left click on the
layer mask of each layer one at a time. You will see the layer mask will
have a red "X". This signifies the layer mask has been
disabled allowing the layer to be visible.
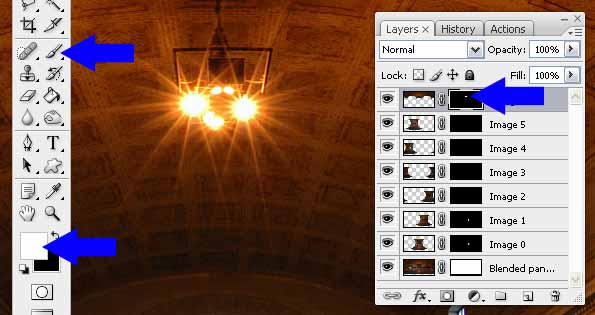
Below I chose the zenith image.
As you can see the rays of the lights line up. Again, check
the other layers to see if they have a better output. Once
you've decided which layer to use enable the layer mask. To
enable the layer mask simply left click on the layer mask.
Below
you'll see the brush tool and white foreground color were selected.
An area of the layer mask of the upper most layer was revealed by
simply brushing parts of it. You can see a small white area on
the layer mask.
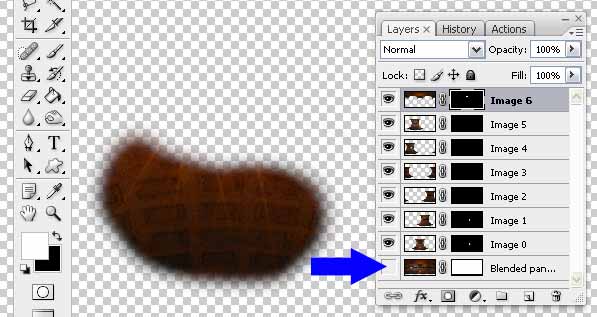
Notice
a box around the layer mask. This signifies that the mask is
selected. This is important.
To view the area showing
through the mask simply click on the "eye" on the "Blended
panorama" layer. This will make this layer invisible.
Click on the box again to make the layer visible.
Go through the entire image
and correct as necessary. Then save.
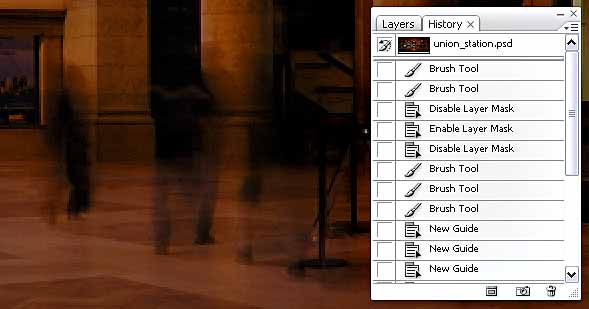
Removing unwanted details... moving subjects.
The
same procedures apply as mentioned above. This is useful
for removing anything that moves such as people, cars, animals,
etc.
Due
to long exposures anything moving will blur. As you can
see from the image below people are blurred. For something
like this I really don't mind having this blur but if you really
want to remove them, again, follow the same steps as
above.
Below I chose the two layers
to remove the people.
Sometimes images just don't line up. There is a
solution to force these images to line up. I use a number
of tools to do this Again the same procedure as above.
The only difference now is you're manually manipulating a layer
to line up.
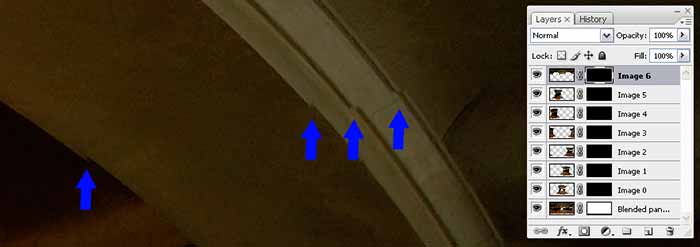
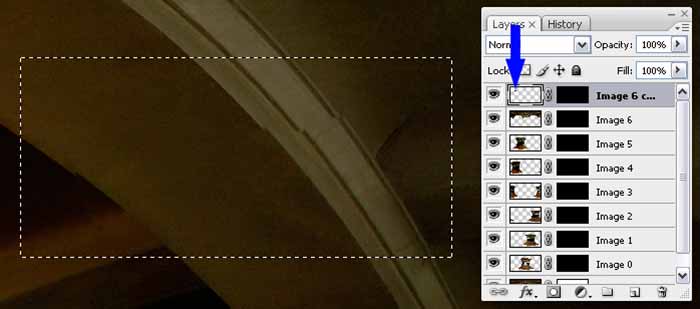
Follow the steps above. Figure which layer can repair the
error by "SHIFT" & clicking on each layer mask.
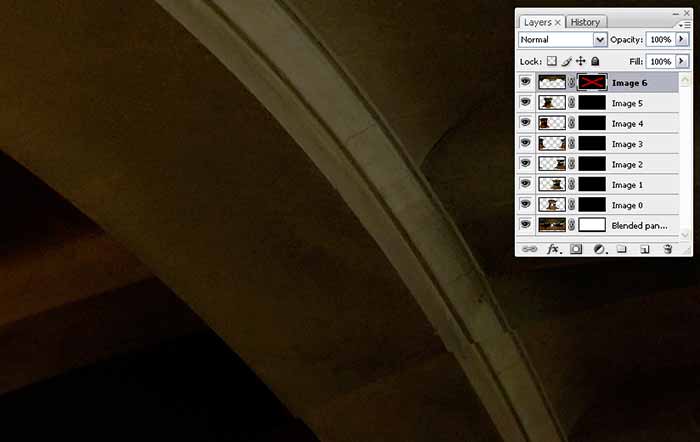
Below I chose the zenith image to fix the error. Notice
the red "X" on Image 6's layer mask. As mentioned above
this signifies the layer mask has been disabled.
Also notice the "box" around the layer mask. This
signifies that the mask is selected and not the image.
THIS IS VERY IMPORTANT. To select which to work with
simply click on either one.
Notice the lower portion of the the zenith image how it does not
line up. Don't worry about this.
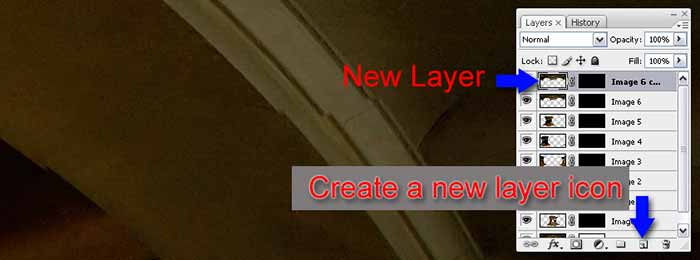
Enable the layer mask again by simply clicking on it.
Next click on the image (layer).
Duplicate the layer. You can do this two ways. You
can either hit "CTRL+J" or drag the layer to the "Create a new
layer" icon at the bottom of the palette.
The
reason for duplicating the layer is so that you can delete the
layer if you happen to make a mistake and start over again.
Also it'll make editing easier.
Next crop the image. This is to make manipulating the
layer easier. If you were to manipulate this layer in it's
full size you and your computer will have a difficult time.
Unless of course you have a super computer.
Select the rectangular marquee tool and select an area
that will be enough to cover the misaligned area.
Now
you will need to select the "Inverse" of this layer. You
can either hit "Shift+CTRL+I" or on the toolbar click on
"Select" then choose "Inverse". Then hit the
"Delete" key.
You
need to select the reverse because you will be deleting the rest
of this layer.
Notice what's left over as indicated by the arrow. Hit "CTRL+D"
to deselect.
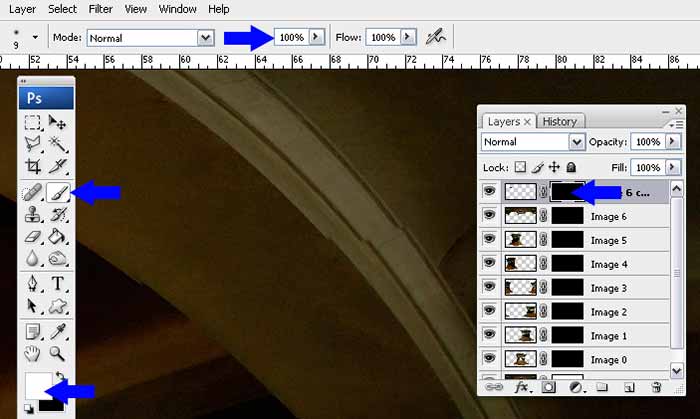
Now
select the brush tool, opacity 100%, white foreground and
select the layer mask.
Again, make sure the layer mask is selected. Now
brush away to reveal the layer beneath.
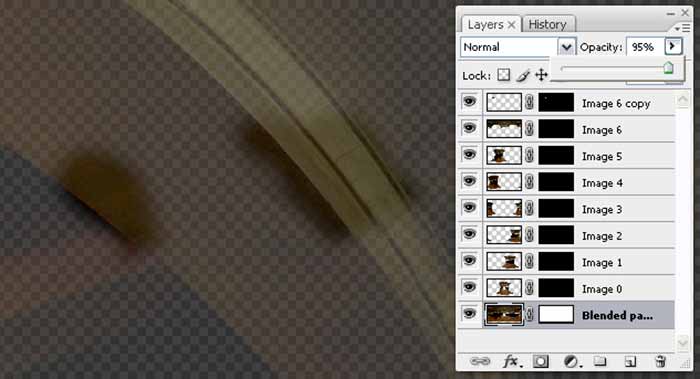
Below I lowered the opacity of the blended layer to illustrate
where I've brushed away the mask.
Here's what it looks like normal. Notice where the
misalignment is now.
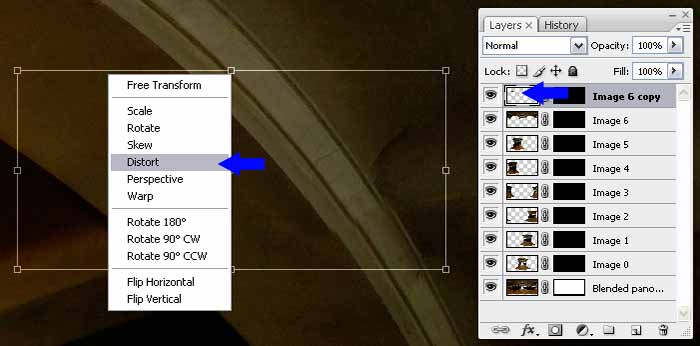
Now
the fun part. Make sure the image (layer) is selected.
Select the transform tool "distort" by hitting "CTRL+T", then
right click and choose distort or on the toolbar select EDIT >
Transform > Distort.
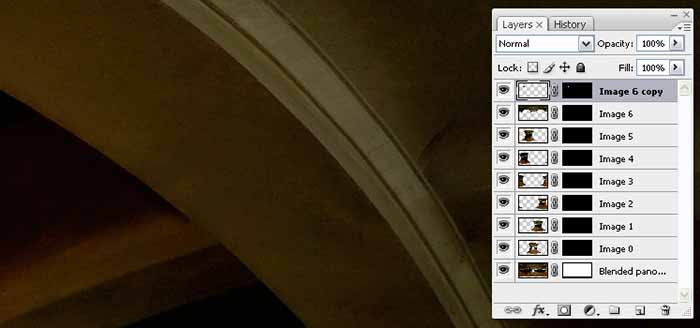
Choose a corner and slowly drag your mouse to match the layer
with the layer beneath. Take your time. I normally
zoom in to have better control.
NOTE:
Sometimes the color and/or exposure may not match. You
can do the following.
Change the following
in Image > Adjustments
Levels
Color Balance
Hue/Saturation
Brightness/Contrast
Match Color
|