►
Save the image and import
into your stitcher software to create an equirectangular image.
►
Convert the equirectangular
image to a cubical projection. You can use Pano2QTVR for
this.
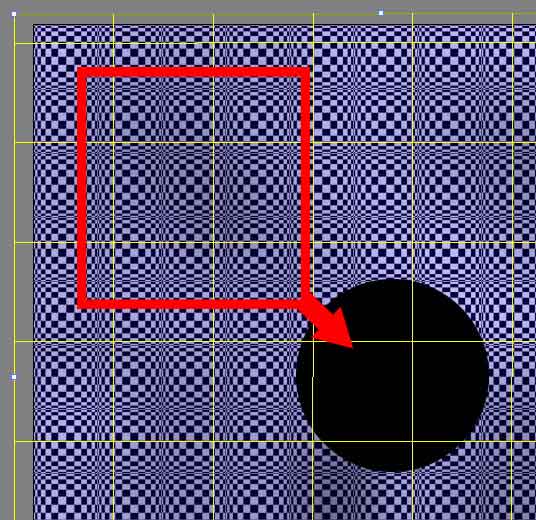
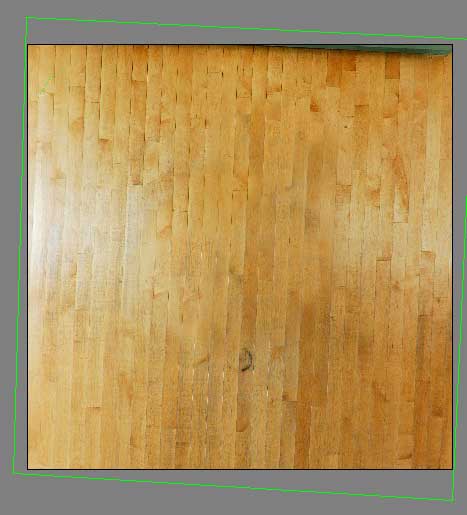
Image below is a sample of a cubical projection of the nadir.
►
Since this particular nadir
has a pattern it would be wise to use the vanishing point
tool.
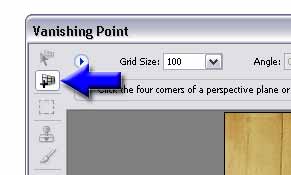
Open the nadir image in Photoshop and click on ALT+CTRL+V
or Filter > Vanishing Point.
A quick note on
Vanishing Point tool...
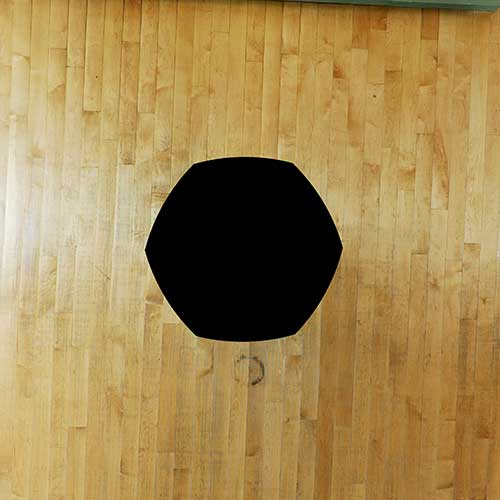
Image below is a "made up"
nadir. The clone and vanishing point tools are similar
in how you use it. But the vanishing point tool has an
advantage. It can automatically blend the cloned
area against its neighboring image.
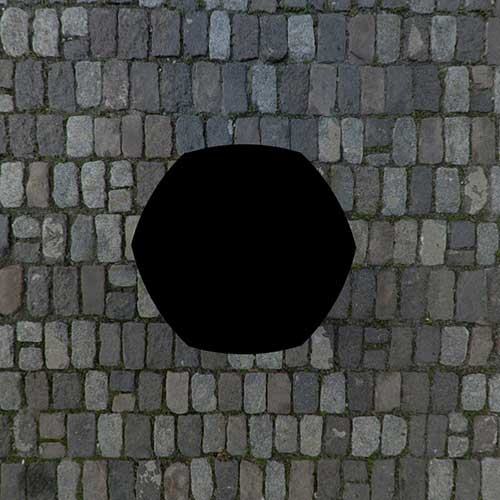
NOTE: I
intentionally left the black area uncloned
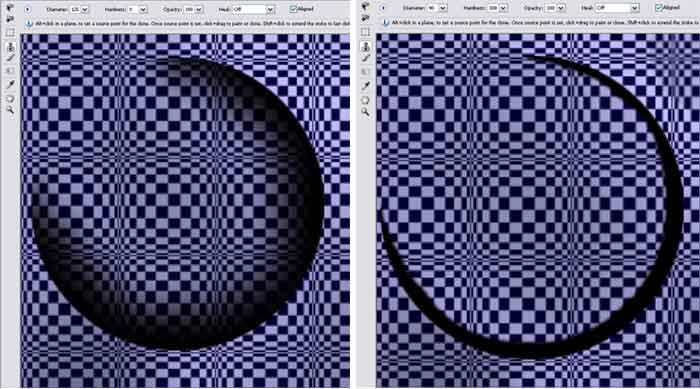
Image below: Notice
when the heal is OFF the vanishing point tool works
exactly the same as the clone tool.
|
Hardness: 0
Heal: OFF |
Hardness: 100
Heal: OFF |
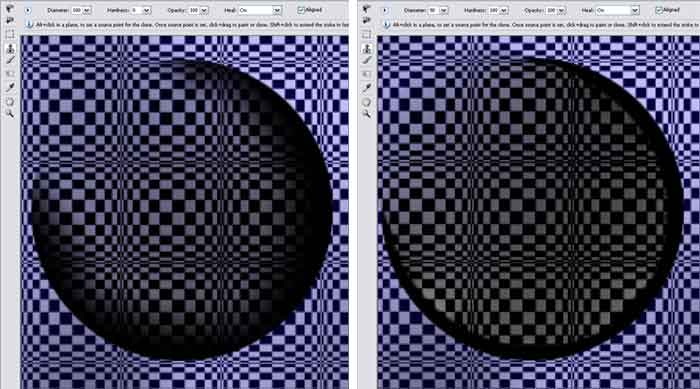
Image below:
Notice when the heal is ON the vanishing point tool
automatically blends the black area with the cloned area.
It tries to have a gradual color blend with the newly cloned
area. This is very important to know when cloning the
nadir.
|
Hardness: 0
Heal: ON |
Hardness: 100
Heal: ON |
In a perfect world it is best
if you have enough surrounding image to completely clone the
nadir in one pass. This is one reason why there is so much
talk about the size of the footprint of the panoramic head...
"Less work".
If it is not possible to
clone the hole in one pass then you will have to clone in small
amounts using the surrounding images with the "HEAL OFF".
Then once most of the hole has been covered turn the HEAL "ON".
You may have to re-clone the previously cloned areas again to
have natural color transition from one edge to another.
By
default the "Create Plane Tool" is selected.
►
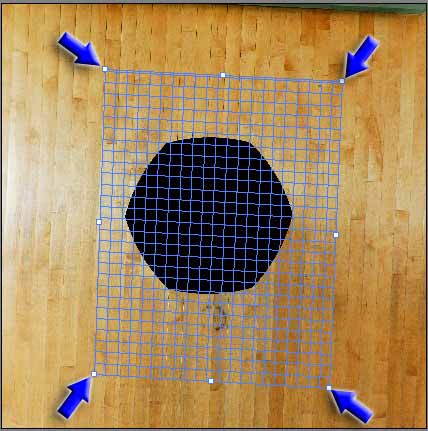
Again, since this is a
patterned nadir, start off creating the plane by clicking on an
edge of the hardwood floor. Click on four points that
matches the floor or pattern. Make sure the plane matches
any "continuing" lines or pattern on the floor because this will
determine whether or not you have a good "clone".
►
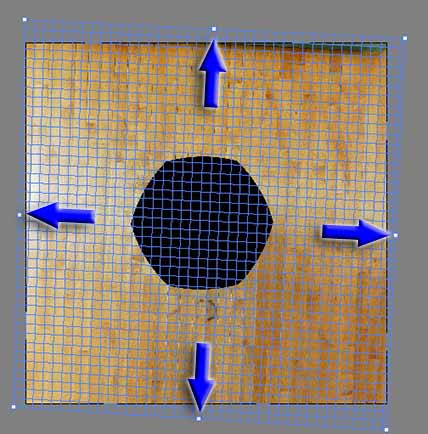
To have more clone area to
work with enlarge the plane by simply clicking and dragging on
the anchor points. You can go beyond the size of the image
as shown below.
►
Select the Clone tool and
select Heal "On". You can change the diameter of your
brush by the Diameter field or you can click on "[" or "]"
to increase or decrease the size of your brush.
►
Select a clone point from the
farthest edge taking into consideration the size of the brush
not including the edges of the image. To select a clone
point click on the ALT key and left click on an area you wish to
clone.
Notice when the clone tool is
selected the plane's grid disappears.
NOTE: For this
particular nadir I had to turn off the heal option due to the
size of the nadir hole. I had to select clone points from
the four corners to cover the large nadir. Once completely
covered I then turn on the heal option and re-clone to blend the
cloned areas properly.
The reason for turning off
the heal option is because the clone tool calculates the blend
around the area being covered relative to the area being cloned.
Since there is a large black area the clone tool calculates the
blending with the black area and the area being covered.
This causes unnecessary darkness to the final image.
►
Convert the six cubical
images back to an equirectangular image or create your MOV file
at this stage.
Patch process - Two nadir images
and one hand held.
► Open the
two tripod nadir images and paste one on top of the other.
►
Rotate the upper layer 180°.
►
Reduce the opacity of the second
layer (60%) so you can see the lower layer.
►
Move or adjust the upper layer to
match the lower layer.
►
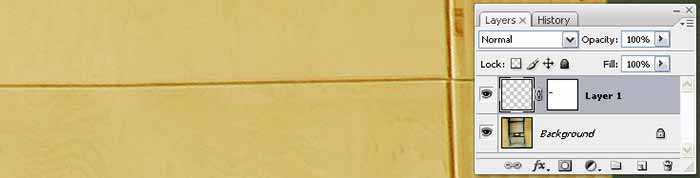
Add a layer mask to the upper
layer.
►
Select the brush tool and black
foreground color and mask out the upper image.
(These are the same steps as
above)
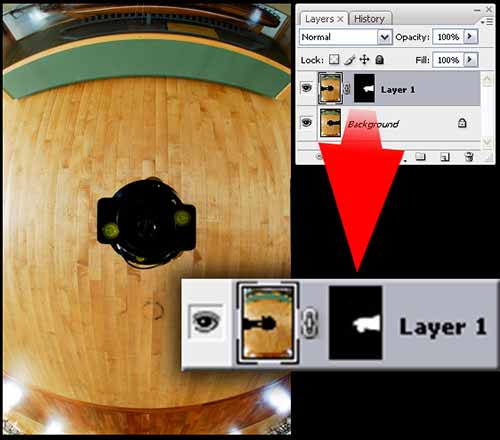
NOTE: The upper
image does not have to match perfectly with the lower layer. The only area that has
to match is the area not being masked out. See the white area
in the layer mask. (image below)
►
Paste the hand held nadir image
on top of the other two.
►
Reduce the opacity of the third
layer (60%) so you can see the lower layer.
►
Move and adjust to match the
lower layer.
►Select the brush tool and black
foreground color and mask out the upper image as shown below.
►
Save the image and import
into your stitcher software to create an equirectangular image
and/or MOV file.
Patch process - One hand
held/Tripod nadir image.
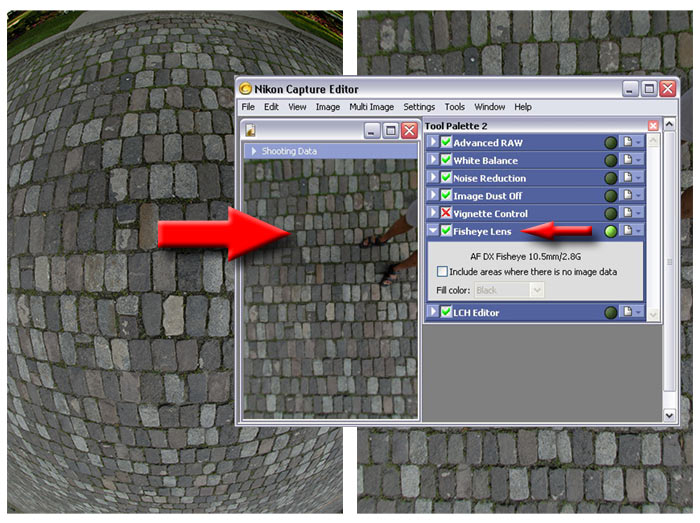
►
After converting the equirectangular
image to a cubical projection, take the fisheye image of the
nadir and "defish" the image through Nikon capture or other
software that has a similar function.
►
Copy an area of the defished
nadir that corresponds with the cubical nadir.
►
Paste on top of the cubical
nadir. Adjust accordingly.
►
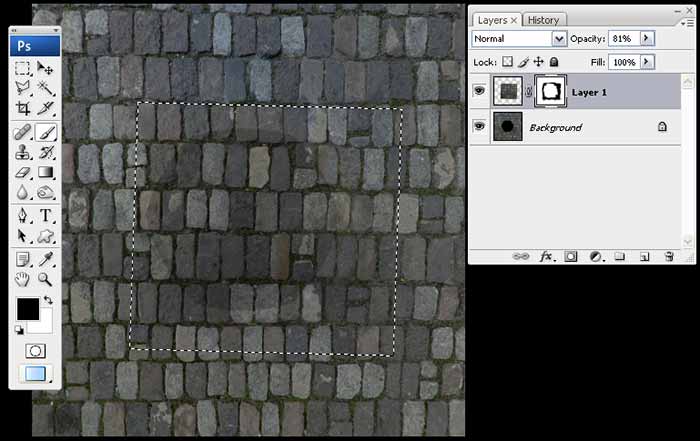
Add a layer mask.
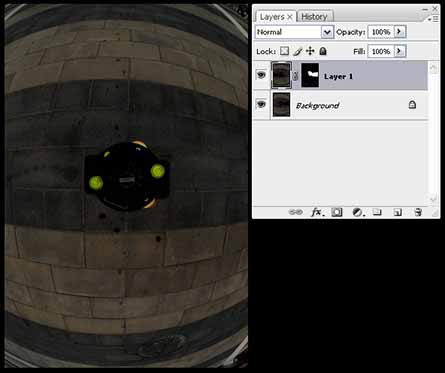
NOTE: I
intentionally selected the nadir patch to illustrate its
location and lowered the opacity to show the location of the
hole.
►
Convert the six cubical
images back to an equirectangular image or create your MOV file
at this stage.
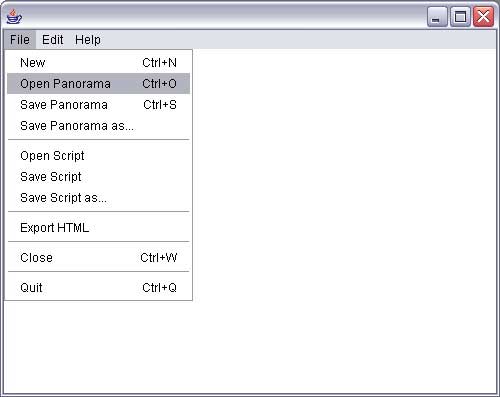
Patch process - PTViewer
The advantage of PTViewer is
that it can take any angle of view of an equirectangular image,
extract the view you want. Edit the extracted view.
Insert the edited image back in the same view point you left the
viewer.
You can also zoom in or out
to adjust for the view you want to extract.
CTRL+Left click = Zoom out
SHIFT+Left click = Zoom in
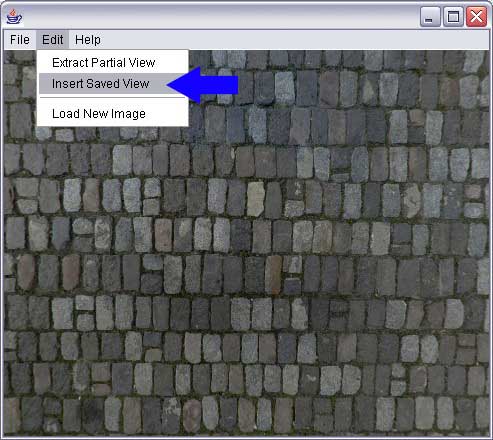
►
Open the
equirectangular image: File > Open Panorama.
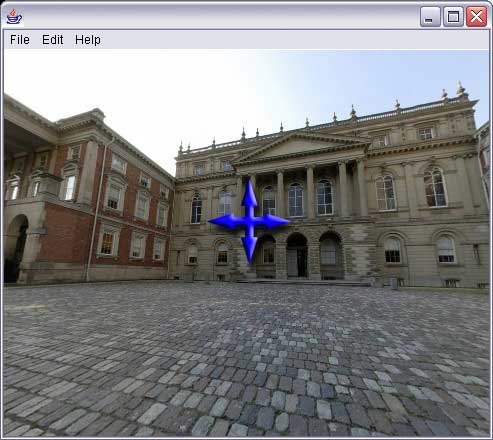
►
Select an angle of view you
wish to edit and extract the partial view.
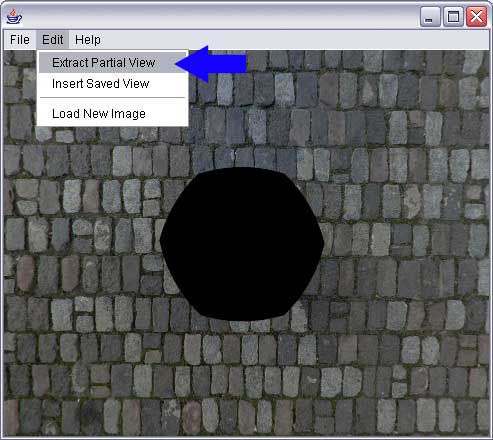
►
Import the extracted image
into Photoshop and edit as per the processes above.
►
Insert the edited image back
into PTViewer.
Patch process -
Copy, Paste & Mask
When all else fails...
This should be last resort.
With practice you should be able to fix most, if not all,
parallax or stitching errors on the layered PSD file.
After you've extracted a
cubical/rectilinear image from either using Pano2QTVR or
PTViewer and when any clone tool just won't fix any stitching or
parallax errors it's time to get creative.
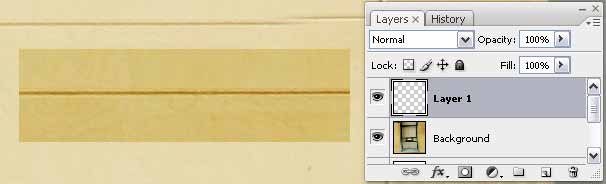
►
Copy an area that is similar
to the area you want to patch.
►
Paste on top. I lowered
down the opacity to 50% of the layer below just to show the area
copied.
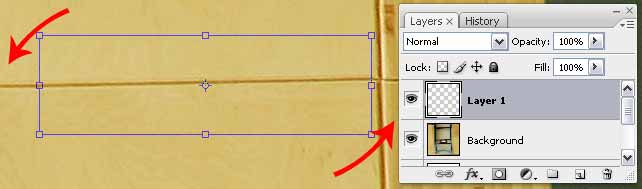
►
Move the copied area into
position and rotate to match the pattern on the layer below.
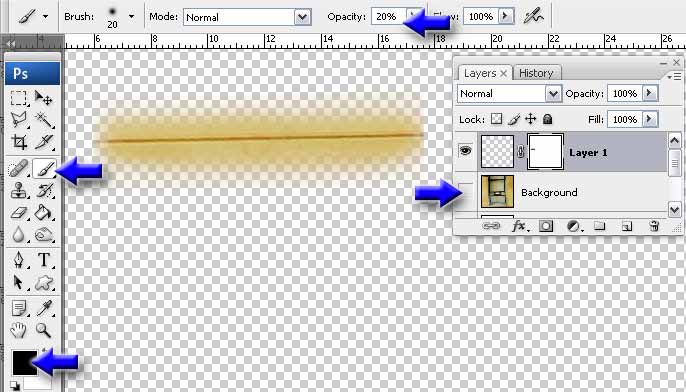
►
Add a layer mask to the
copied area and hide unnecessary detail.
Below, the brush tool and
black foreground were selected. The opacity of the brush
was reduced to 20% to have better control of feathering the
edges.
The visibility of the lower
layer was disabled to illustrate the masked layer.
►
Fixed.