|

|
|
 |
|
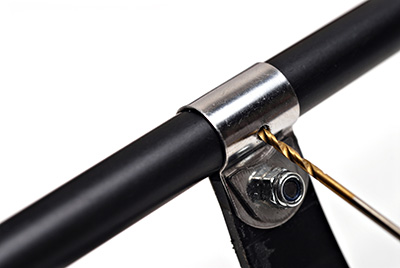
Notice the hex keys
supplied. |
|
| |
|
|
 |
|
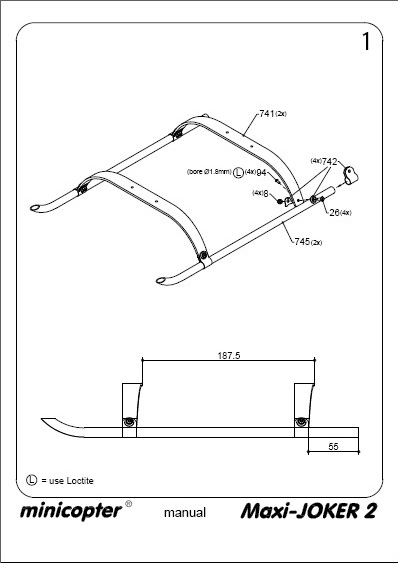
You'll need to a
drill for this step.
Start with the rear
cross supports. |
|
| |
|
|
 |
| |
|
|
 |
|
Do not drill the
front landing bow just yet. Just in case there is
a misalignment when attaching to the lower frame.
Don't forget to use
loctite. |
|
| |
|
|
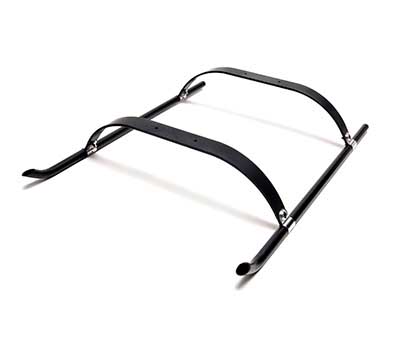
CRASH NOTES
Parts 741 (arches)
sometimes can be hammered back to shape. |
|
| |
|
|
| |
|
|
|
|
|
|
Back to top |
|