Home     Image Gallery      Panoramas     Links     Technical     About


Nodal Ninja 3 MKII


Model:

NN3 MKII w/ R-D16

VR Head Type:

Multi-Row Spherical Panoramic Tripod Mount

Weight:

460 grams

Dimensions:

7" x 2" x 2"

Load Capacity:

Approximately 4lbs

Color:

Matte Black

Material:

Aluminum

Large Bodied DSLRs / Medium Format Compatibility:

No

Leveling:

Bubble

Numerical Demarcations:

On rotational, vertical & rails.

Bottom Thread Attachment

3/8", 1/4"

Rotator head adjustments:

R-D16

Vertical Arm Rotation:

360°

Panoramic Rotation:

360°

Camera Quick Release:

Yes.  Optional T-adapter allows for use of quick release plates

Upper arm detent stop:

No

Landscape Mode:

Yes, with T-adapter.

Tools Required For Assembly:

No

Warranty:

2 years

30 day money back

Tools Supplied:

1 hex key

Spare Parts Supplied:

Yes

Case Supplied:

Yes

Accessories Available:

Yes

Upgrade:

No

Customer Support:

Yes

Manual:

Yes - here

Suggested Price:

US $199.95

Web site:

http://www.nodalninja.com


The NEW NN3 MKII package includes detent rings 15/0, and 45/60 (optional rings available 18/20, 25.7/36, 51.4/72, 90/120), hard case, quick ref. guide, 2 rail stops and new Camera Mounting Plate (N-CP1).


Features


Rotator base.  Underneath the rotator base is a 3/8" adapter.

(Notice the size of the base; small footprint)


Reversible detent plates (15°/18°, 20°/24°, 45°/60°, 90°/120°, 72°/0°)


Test set up:


Camera: D70s

Lens: Nikon 10.5mm Fisheye

VR Head: NN3


Manfrotto's 337 double bubble level.

Used throughout the test.


NN3's suggested mount for the upper rail @ 80 mm.  (Nikon D70 & 10.5mm lens)


The camera base rubber mount has a white line marking the center of the screw for ease of assembly. 


NN3's suggested mount for the lower rail @ 55 mm.  (Nikon D70 & 10.5mm lens)


View NN3 in QuickTime.

Turned every 10° both horizontally and vertically.


Observations...


A bubble test was performed by simply rotating the VR head.  The bubble stayed level throughout as well as the 337 double bubble on the hot shoe.  This ensured the entire assembly was aligned.


Precise demarcations on the upper rotator.  When the 0° is set to the center point the rear 0° also lines up perfectly.


Precise click stop at the 0° mark.


The center point is clearly inline with the detent plate's notch.


Camera mounting test with the recommended set up for a D70s.


Here you can clearly see the laser at the front 0° mark is perfectly center with the lens.


Here you can see the laser at the 90° mark perfectly inline with the lens' entrance pupil with the 80 mm upper rail setting.


Here you can see the laser is perfectly inline with the center mark on NN3's base and the lens' center at the 55 mm lower rail setting.


The 337 on the hot shoe, which is very difficult to see, is perfectly leveled.  Used to assist in test accuracy.


For the curious...


Compared to its peers.


Size...

You can clearly see the size difference between the Nodal Ninja 3 and Manfrotto's 303SPH.


Weight...

NN3: 460 grams

303SPH : 2 kg


Cost...

NN3: MSRP (US) $199.95

303SPH: (US) +$500.00


Accessory


30mm T-Adapter


T-Adapter mounted on D70s.

T-Adapter in the portrait position.

T-Adapter in the landscape position.


T-Adapter for Off-Axis tripod mount


For cameras with an off-axis tripod mount.  The T-Adapter solves this problem.


NN3 can be combined with Manfrotto's 300N panoramic rotator.


NN3 Tips


TIP 1: Quick remounting.


In a fairly lit location, I sometimes remove the camera for a hand held shot of the nadir or for long exposures I move the camera to its farthest position on the upper rail for a nadir shot. 

(See Tip 3 below)


To quickly mount the camera back or reposition back to the entrance pupil setting, as an aid,  I've screwed in these scrap metal to mark out the exact location of the camera mount.


I believe any VR Head is precise as long as it is constructed well.  "Precision" also depends on the user's entrance pupil adjustment during set-up.  Once this is done, with this small modification, this NN3 is as precise as any of it's top competitors.  Even better, it's affordable...


UPDATE - August 2007


Nick Fan, the inventor of NN3, added "rail stops". 


Now available with NN3 package.


Rail Stop setup


TIP 2: Less work.


To reduce the size of the hole of the nadir and the amount of work in Photoshop, Eric Rougier from FROMPARIS.COM developed a technique, he suggest pointing the camera 10°-15° downwards.


Notice the footprint of the tripod was also decreased to avoid being in the shot.


This also helps in circumstances where you may not be able to shoot the nadir due to long exposures and/or space restrictions and may have to resort to "creating" the nadir via clone or vanishing point tools in Photoshop.


Angle the camera down until you see the VR head rotator or tripod.  You will also see a bit of the arm of the VR head.  The arm will be masked out during the stitching process. 


With the six pan images, you can slightly see part of the tripod and arm of the NN3.


Here's the nadir after conversion from an equirectangular to a cubical image. 

PANO2QTVR was used to convert to a cubical projection.


The vanishing tool would be the perfect tool to fill in the hole.  Of course you would only resort to this technique if you didn't have a shot of the nadir. 


Learn the patching technique here.


But there is no excuse for that...  See tip 3.


TIP 3: Shooting sequence and overcoming long exposures of the nadir.


I know I should perform a night shot to illustrate long exposure nadir shooting but it'll be difficult to see the tripod's position relative to the ground's detail.


The three nadir images that will be layered together. 


With this tripod position and VR head angle, you can clearly see how much of the nadir you can play with in Photoshop.


A closer look at the nadir shot for long exposures and capturing grounds with detail.


Below is another variation of the technique above.  This is useful when space is limited.


1 - Adjust the two front legs of the tripod.

2 - Just in case the tripod slips, ready your left hand to catch the camera.

3 - The right foot is the main holding point here.  The left foot prevents the front tripod legs from slipping back.


Use remote control or timer to release shutter.


A sample nadir shot of the technique above. 


Similar to the first technique, this gives you ample nadir image to play with.


An alternative tripod to use...  More details here


In Photoshop


Layer and align the three images.  Add a layer mask to the two top layers.


Assemble the images with your stitching software.


Understand how to work with layers here then learn to patch here.


The panorama below was a test shot with the settings and techniques above.


Software: PTGUI and Photoshop

Stitched 6 pan shots,1 zenith and 1 fixed nadir all at once.


QTVR


NEW NN3 MKII parts exploded view.


Sizing up your camera and lens for the NN3


Camera and Lens settings available here

More lens setting here and here.


NOTE:  Lengths "B" and "C" are simply a guideline to determine whether your camera and lens combination will fit the NN3.  If your camera and lens combination is longer,  it does not necessarily mean your camera and lens combination will not fit the NN3 for the correct entrance pupil setting.  The entrance pupil setting may be positioned well behind the front of the lens therefore you may have enough allowance to correctly position the lens for the entrance pupil.


The T-adapter (N3T30) gives you an additional 30mm length.  When placed on the upper arm, however, you will not be able to fully rotate your camera for a zenith shot or for a full 360°x180° spherical panorama as the T-adapter will come into contact with the lower rail when lowered.


Conclusion


In this review I personally did not find any flaw within Nodal Ninja 3's intended design.  On the Nodal Ninja site they mentioned its limitations such as not being able to accommodate large DSLRs or cameras with battery grips.  Nodal Ninja 3 also does not support Nikon's FC-E8/9 fisheye converter for the Coolpix cameras.  Due to NN3's size, for obvious reasons, large lenses such as 70-200mm is not recommended. 


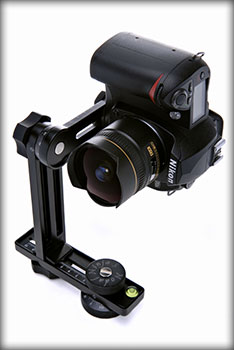
Overall impression of the NN3?  First I had to ask myself, "Did this VR head meet my expectations and requirements to be able to create a full 360°x180° spherical panorama?" 


I would have to answer yes.  After all that is my ultimate goal as a VR photographer.


I would give this a perfect score 
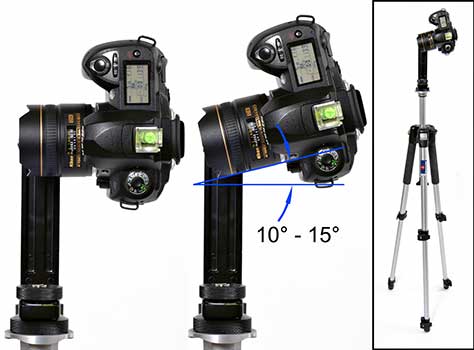
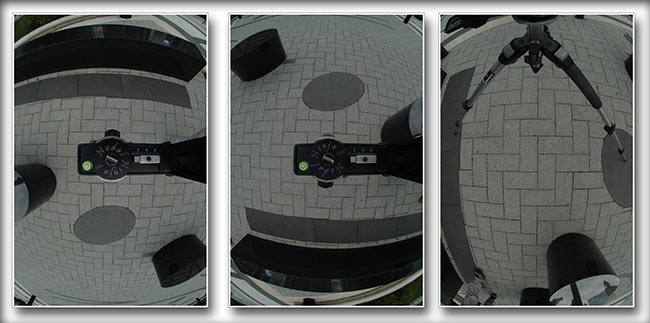
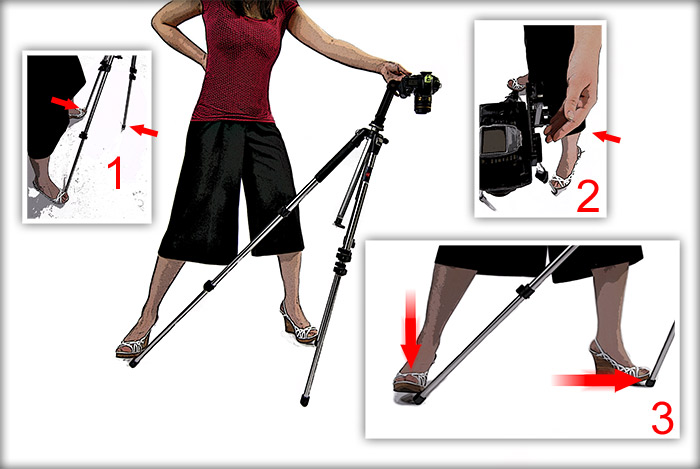
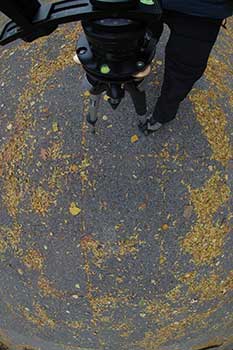
of 10.  This VR head can do it all.  The concern that most people have who creates full 360°x180° spherical panoramas, besides entrance pupil calibration, is having a shot of the nadir without the tripod in view.  As shown above there are various techniques that can be used to overcome this.  Even with long exposures.


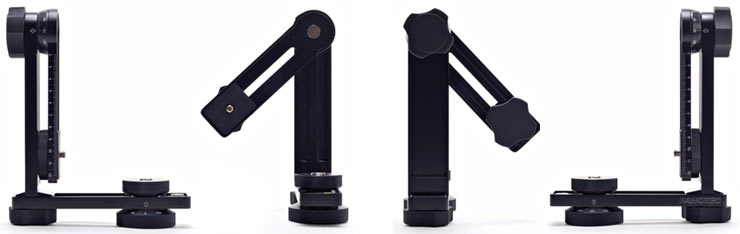
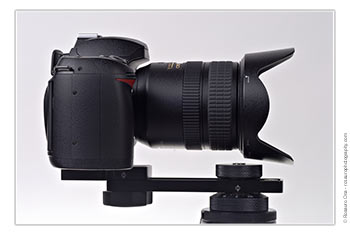
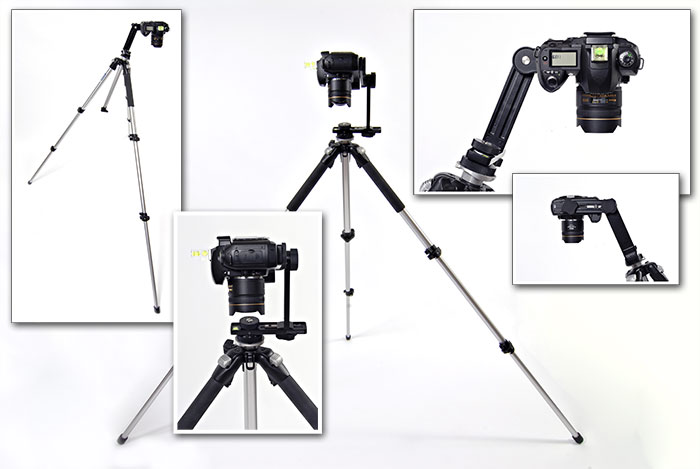
I love the size and weight.  It's great for traveling.  You could actually keep the entire VR head assembled.  I shot 250+ panoramas within two weeks.  I walked around with the camera and VR head already mounted on the tripod.  For example the Casa Loma panoramas, 50 of them, were all done within two days.  You wouldn't want to remove the camera from the VR head, put it in your bag, only to mount it back again within the next minute. 


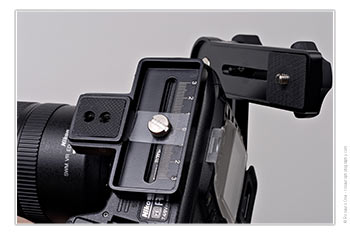
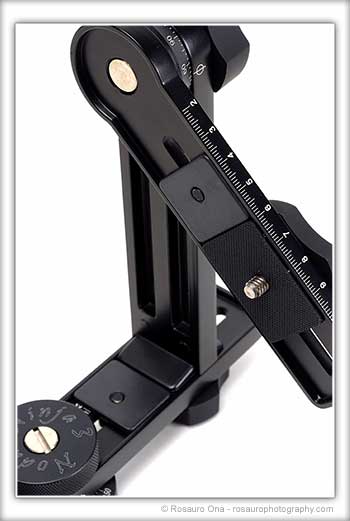
The metal is light and strong.  There is no visible flex or give when tightened properly. 


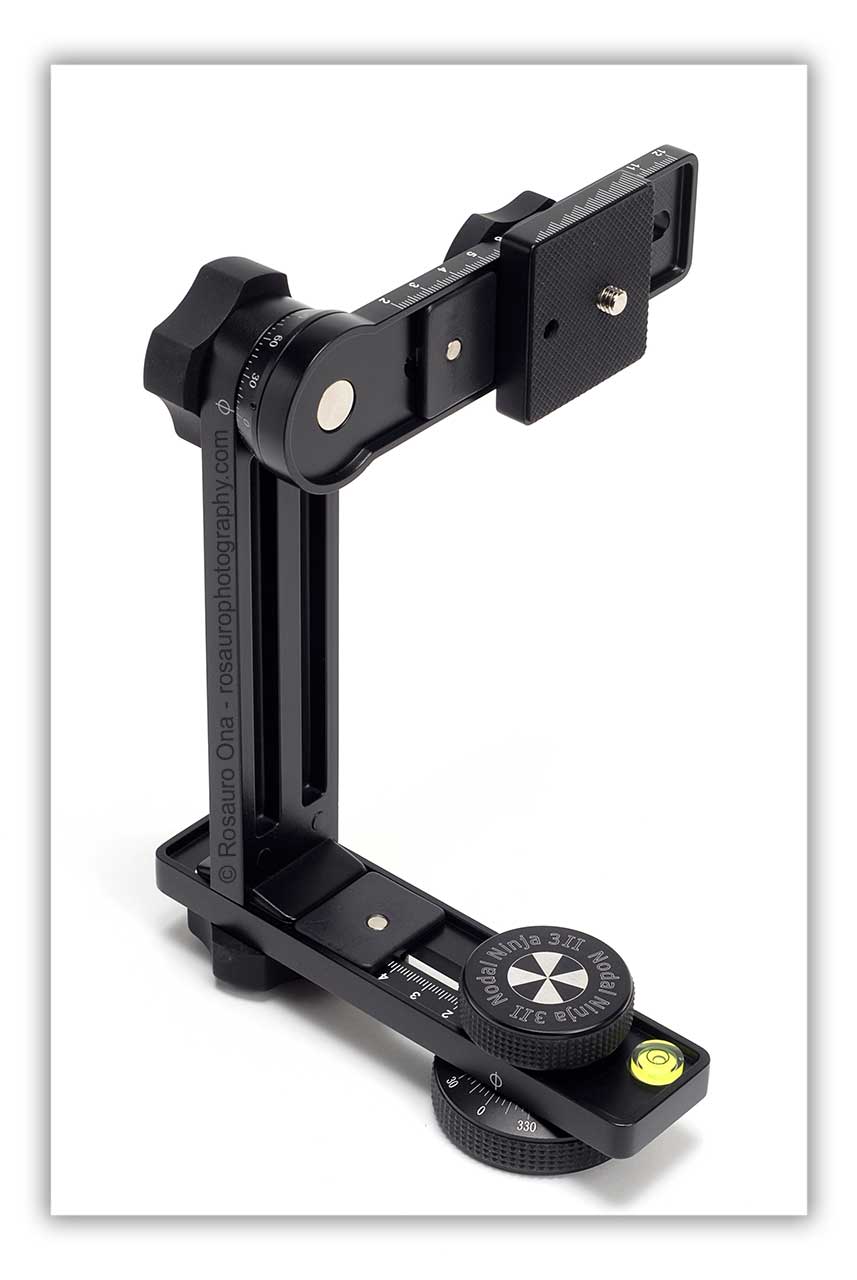
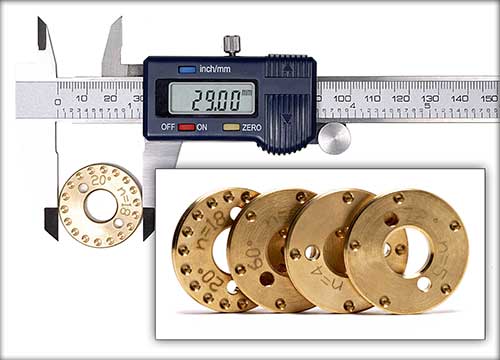
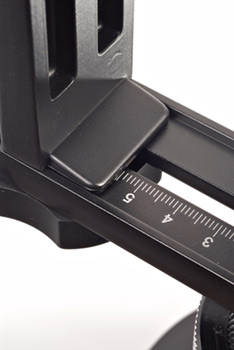
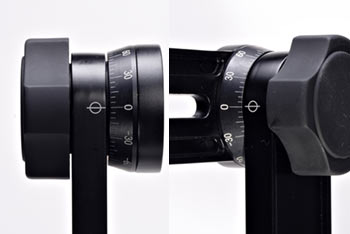
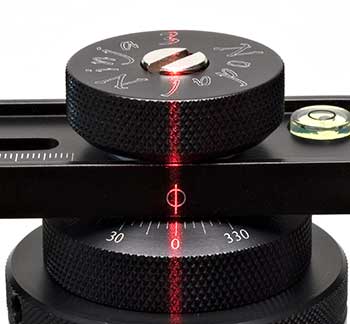
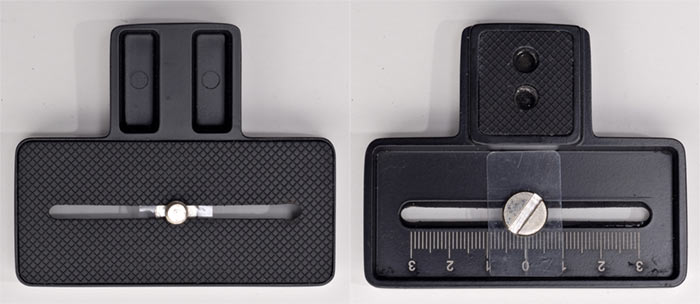
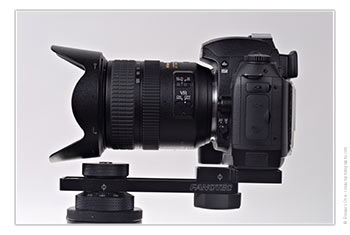
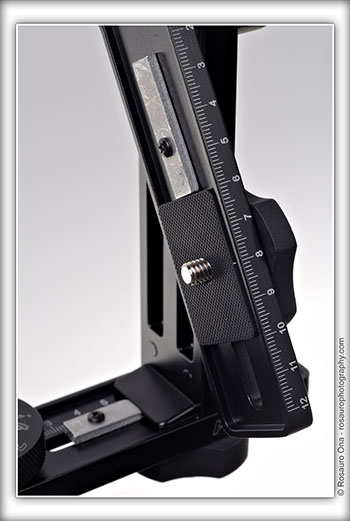
The detent plates are excellent.  The degree markings and color  added to the "center" notch are a nice touch.  Again, this is attention to detail and speeds up assembly if you're in a rush. 


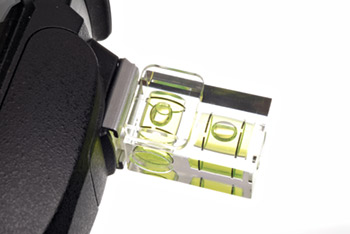
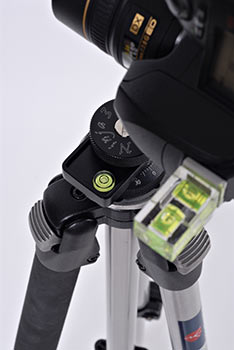
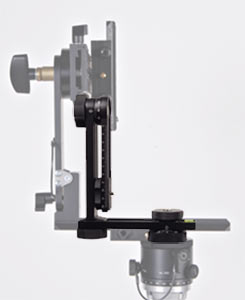
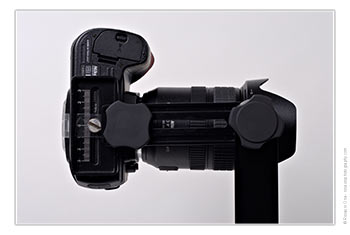
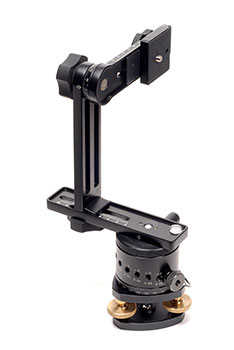
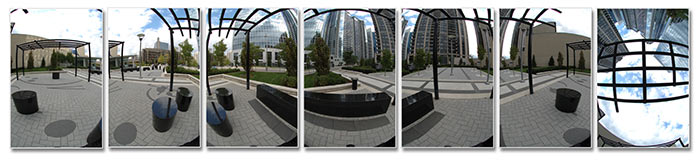
When leveled properly, the NN3 assembly stayed leveled throughout the 360° turn.  This means the vertical, upper, lower rail and rotation base assembly are accurately designed and built.


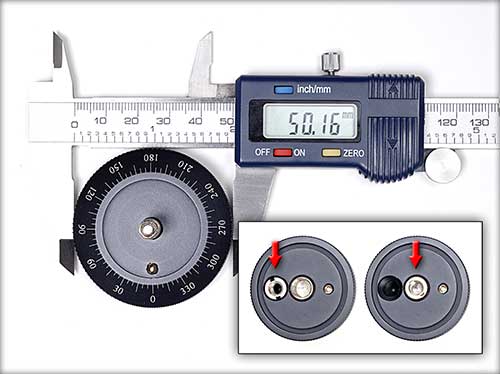
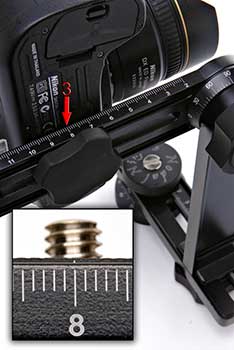
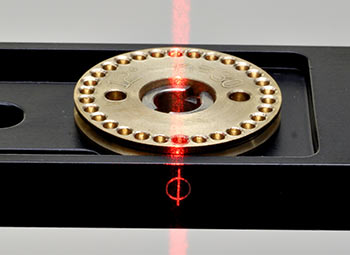
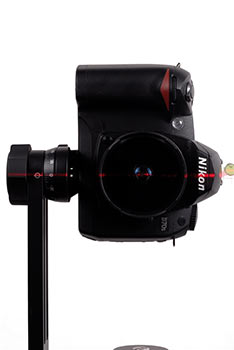
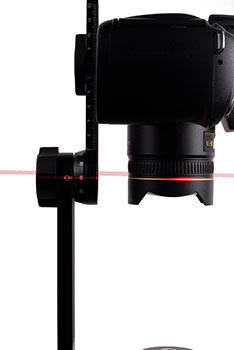
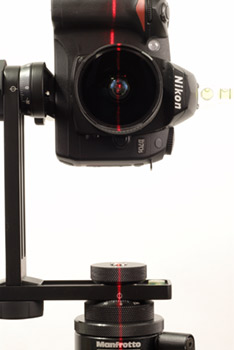
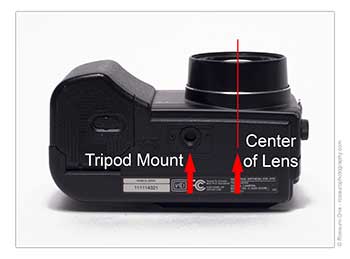
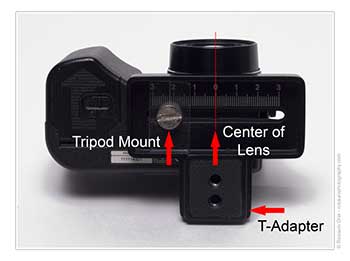
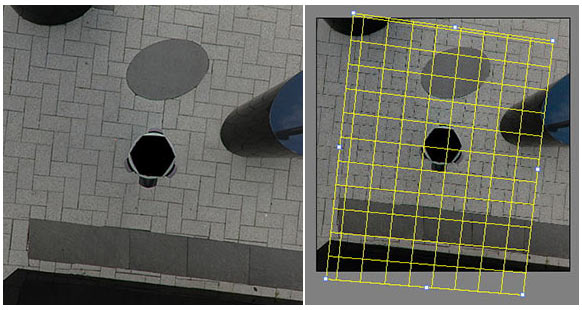
As you can see with the laser images, the accuracy of the suggested set-up for the particular camera and lens combination is perfect.  Someone obviously did their homework.  Read the "Finding The Point" tutorial just to see how accurate these settings are.


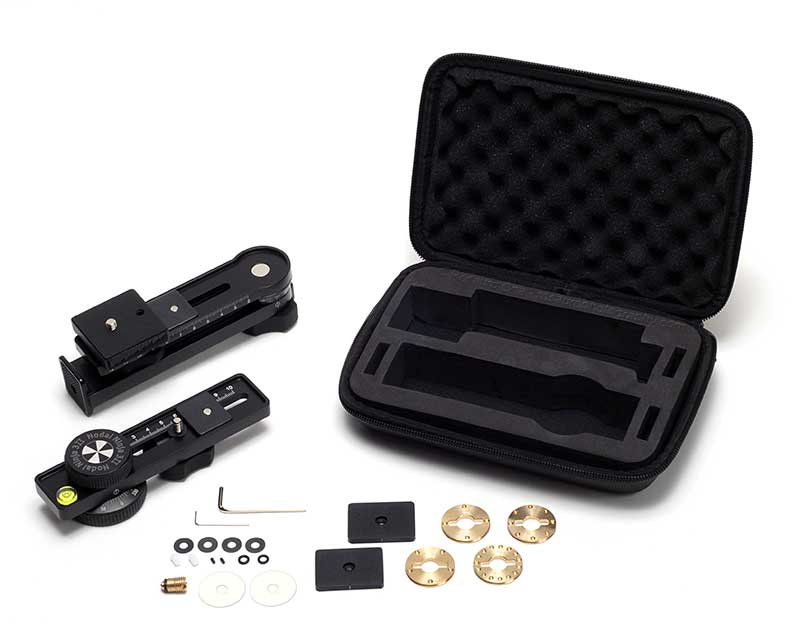
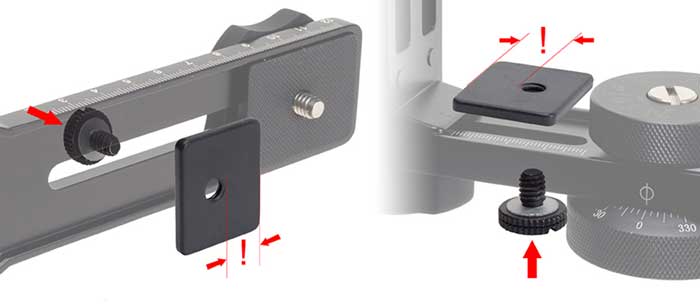
The optional case, hex tool and spare parts are a nice touch! 


The price, compared to  most VR heads, is incredibly affordable.  Product was packaged and shipped the next day.  Arrived on time.  I placed a rush delivery.   Arrived within three business days.


Anyone who has dealt with Bill Bailey, from Nodal Ninja, knows for a fact the personal service he puts towards his customers and professionalism is A+++. 


If everyone could please stand up and give Nick Fan, the inventor and manufacturer of Nodal Ninja 3, a standing ovation.  Job well done!


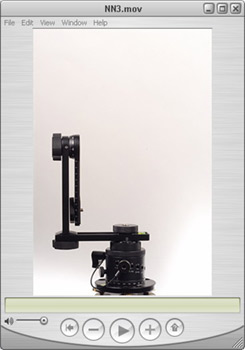
For more examples of the NN3 in action visit my panorama page where 91% of the panoramas were shot with the NN3.


Highly Recommended!


Back to top


About these reviews...