|
 |
Intro to Panoramas and
QTVRs |
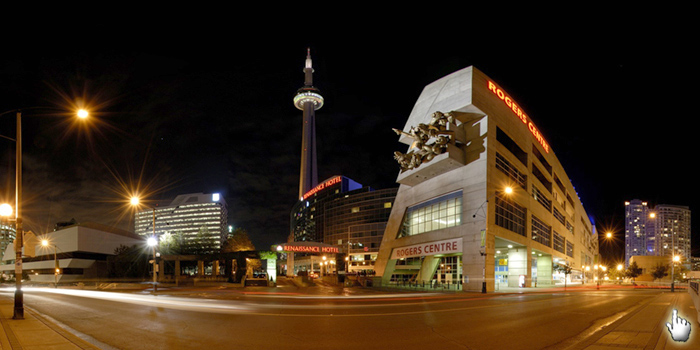
Rogers Centre
(formerly known as the Skydome), Toronto
|
I
hope the following information will help you understand the entire
process in creating these panoramic images.
I’m
not the authority on this subject matter. I’m simply
sharing information obtained from my hands on experience and research.
There are detailed information on this subject available on the
internet. There are also many other ways of
creating panoramas with different hardware and software. The
following process is based on hardware and software that I am
currently using and is by no means the only way to produce panoramas. If you have detailed information;
a different process; or correction to mine, and willing
to share them please don’t hesitate to contact me.
|
|
|
Terms you should know
|
The following descriptions have been intentionally defined as simple
as possible without getting into technical details. Detailed
information are readily available on the internet..
If my diagrams are not accurate enough or need more detail please
let me know. Thanks!
|
|
|
|
|
|
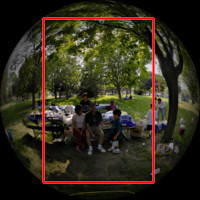
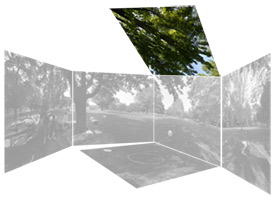
Cropped Circular Fisheye Image |
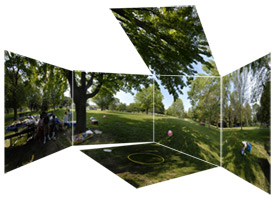
Cubical Projection |
|
The corners are unusable as they are
at the outside of the circular
image.
|
A
panorama converted to a straight, flat, six-sided image.
|
|
|
|
|
|
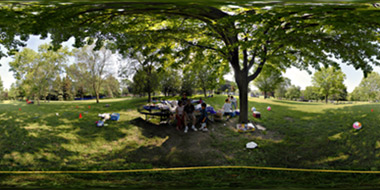
Cylindrical Panoramas |
Equirectangular Panoramas |
|
A 360° panoramic image.
|
A single stitched image that has a 2:1 (width: height) ratio.
Requires a panorama viewer to view the image. |
|
|
|
|
|
Full Circular Fisheye Image |
Full Frame Fisheye Image |
|
A 180° image horizontally and
vertically. |
From either Canon's 15mm or Nikon's10.5mm
fisheye lens.
|
|
|
|
|
|
|
Nadir |
Parallax |
|
The view
directly below.. "Down" shot. |
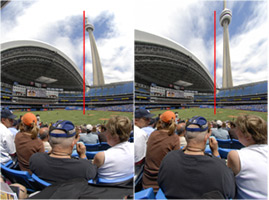
Occurs when the images to stitch were not shot at the
same “nodal” area (a shift). |
|
|
|
|
Nodal Point,
Entrance Pupil, No-Parallax Point |
|
In short,
it's the “point” or “area” where the
camera’s lens rotates that will produce the least amount or no
parallax at all.
That's trying very hard to define it in one sentence...
Not even close.
|
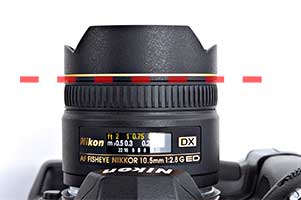
For example, the
"No-Parallax Point" on Nikon's 10.5mm Fisheye is approximately just
behind the gold band.
|
|
|
|
|
|
QTVR |
Rectilinear Projection |
|
QuickTime Virtual
Reality. A type of movie, created by multiple stitched images, that allows
viewing interaction.
Click on the image!
|
A type of projection for mapping out surface of a spherical image
converting it to a “flat” and straight image.
Useful for editing
purposes. For example creating "nadir" or "zenith" caps. |
|
|
|
|
|
|
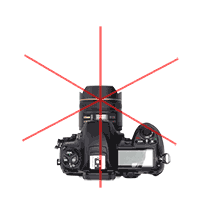
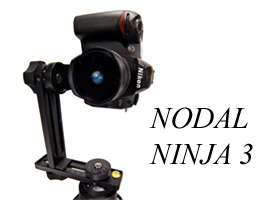
VR Head |
Zenith |
|
A specialized
tripod head used for shooting panoramic images. A camera
mount on a tripod that allows precise adjustment for the camera
lens’ entrance pupil.
This particular model is
Nodal Ninja's VR head. They are based in California. Click
on the image to visit their web site.
Bill Bailey from Nodal
Ninja
will more than be willing to correspond with you. |
The view
directly above. "Up" shot.
|
|
|
Camera & Lens
You
can use any camera (digital or film) for panoramic
use. A VR head and tripod should be used for accuracy and to limit
parallax.
|
|
DSLRs are more flexible compared
to point-n-shoot cameras but...
A Point &
Shoot camera cost less, easier to
use, lighter, and with a
fisheye converter will require less images for a full
360° BUT cannot change lens.
Work with
whatever camera you have.
|
For
cylindrical or partial panoramas use any lens and body combination that is compatible with the VR head.
For
a full 360°x180° spherical panorama QTVRs a camera
with a fisheye lens or a fisheye converter could be used to minimize
the number of shots.
Although you can create a full 360°x180° spherical panorama just the
same without fisheye lenses. You just have to shoot more
images. ...Multi-Row...
|
|
|
|
|
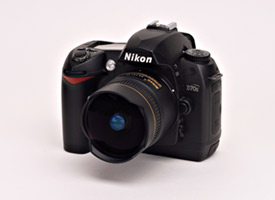
(Nikon image) |
|
|
A
P&S (Point-and-Shoot) camera will require a fisheye converter if
you wanted to take less images.
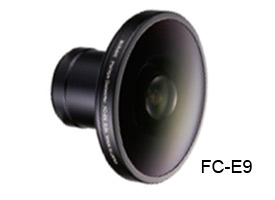
For
example the Nikon Coolpix cameras has a fisheye converter, the
FC-E8 / 9, that can produce an image between 180° to 190° “full
circular” fisheye, depending which camera it's mounted on, thereby
requiring fewer images to stitch; around 2 – 3 photos.
|
NOTE: Be careful
when choosing a VR head to purchase when using fisheye converters.
Some VR heads will not be compatible with this type of lens due to
its size.
For example, Nodal
Ninja's NN3 will not support Nikon's FC-E9.
|
|
A
DSLR (Digital SLR) camera’s fisheye lenses will either be a “cropped
circular” or a “Full-frame” fisheye image.
At
least four images are required for a cropped circular fisheye lens
and around 8 – 10 images are required for a full frame fisheye; six
shots (one at every 60°), one zenith, and one to three nadir shots.
|
Tripod & VR head
Use a tripod when creating panoramic or QTVR
images. When I was first learning this art I was hand holding
my panoramic shots. It's definitely not a guaranteed technique
and will require more post processing as the images will
require manual manipulation to properly align each image.
Stitching software will do its best to stitch the images but will not be
100% accurate. Manual manipulation will still be required with
Photoshop and/or stitching software.
|
|
|
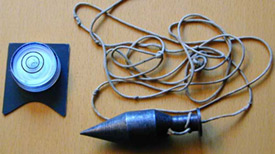
There
is a method to aid hand held shots or if budget is a concern. I got in touch with the
creator himself, Philo. Nicknamed after himself, the “Philopod”,
it’s a technique that gives hand held shots
a bit more precision. It requires some sort or weight (plumb bob),
a string and a level. Still not a 100% solution to avoiding
parallax but a better average than a normal hand held shots.
Click on the image to go to his site for his explanation.
(Philo's image)
|
|
The "Philopod" |
|
|
|
There
are many different types of VR heads. Which to choose will
depend on the task; and keep budget in mind.
|
As
you do your research you will find many people will have different
opinions on the use of VR heads. Some will say it's not
necessary, some swear by them and some go in between by creating
their own. Only experience will dictate what you need.
So, try it for yourself; with and without a VR head. |
|
|
|
|
|
Single Row VR Head
Kaidan's Standard VR head
(no longer available) |
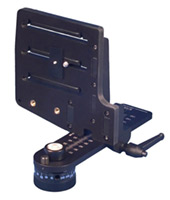
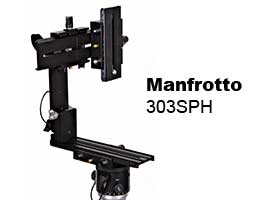
Multi-Row VR Head
Manfrotto 303SPH |
|
A single-row
VR head; for cylindrical panoramas.
This simply rotates a full 360°. This VR head comes with a
rotation base that has a
graduated scale along it's circumference and interchangeable detent
discs, camera mount and sliding camera bracket to align
the lens’ nodal point.
Click on the image for
more info.
(Kaidan image)
|
A
multi-row VR head. For equirectangular or full
spherical panoramas.
Manfrotto 303SPH, a multi-row VR head that rotates 360° horizontally
and vertically allowing a zenith and
nadir shot to complete a full 360° spherical panorama.
Click on the image for
more info.
|
|
NOTE: Some VR
heads are not compatible with DSLRs with battery grips or large
camera bodies like Canon's 1Ds Mark II and most medium
format cameras. |
|
Softwares
Some camera
or VR head manufacturers will supply bundled software (or offer a rebate
on a purchase) that will allow
photo-stitching capabilities. There are many out there.
|
|
|
|
|
PTGui |
Pano2QTVR |
|
PTGui
is a panoramic stitching program for Windows. PTMac for Mac
users.
Click on the image to
visit the site.
|
Software to
convert equirectangular image into a cubic projection or a QTVR
(QuickTime movie). Again, there are a couple them out
there.
Click on the image to
visit the site. |
|
|
|
Another excellent
application from Garden Gnome.
Pano2VR can convert
cubical or spherical images to various file formats such as
QuickTime and Flash. Customizable skins, hotspots and
directional sound are other features of the software. |
|
|
|
|
|
Cubic Converter |
Photoshop CS3 |
|
Another excellent software for converting to cubic projection, for MACs only, is Cubic Converter.
They are based in Australia. Click on the image to visit the
site.
|
For
creating a “nadir” cap or “hiding” the tripod from the image, you
will need some creativity. You will need a photo editing
software. A popular one is Adobe's Photoshop. A cubic
converter software and Photoshop goes hand-in-hand.
Click on the image to
visit the site. |
|
|
|
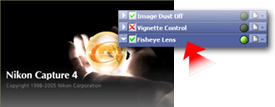
For
Nikonians out there, there is a feature with Nikon Capture 4 that
can "defish" or flatten a fisheye image in a single click.
This is very useful when editing the nadir shot (bottom image) or
zenith (upward image) in a
cubical image.
As an alternative you
can also use PTGUI to defish a fisheye image.
Click on the image to
visit the site. |
|
Nikon Capture 4
|
|
|
|
|