|
FAILSAFE
NOTE: These
sample images are from a Futaba 12z.
I
assigned channel 7 on my RX for the U (control mode
function) channel and assigned a three position switch
on the transmitter. Renamed a function to GPS and
assigned it to channel 7.
There are different
ways to set up FAILSAFE. Options may vary from one
radio to another.
Basic
► Set up a program
mix.
► A linear curve will
suffice.
► Adjust the slider until it is
within the FAILSAFE zone or when the FAILSAFE zone
is highlighted in blue.
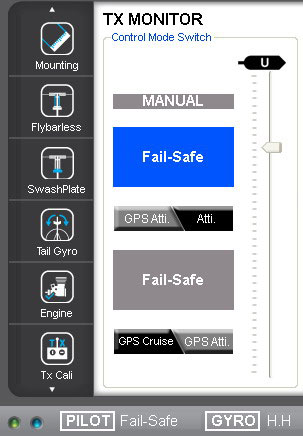
► While this is
highlighted go to the transmitter's FAILSAFE settings
screen and set the Control Mode switch value.
(Values will vary)

► Re-adjust the
slider back to normal.
Advance
Set up a second
switch on your transmitter to be able to activate
FAILSAFE manually without the need to power down the
transmitter.
The benefits of being able to activate FAILSAFE without
turning off the transmitter are the ability to conduct a
controlled FAILSAFE test and to take advantage of ACE ONE's
FAILSAFE "Return-To-Home" feature.
The Return-To-Home
feature is only available in FAILSAFE mode.
It is covered later in "Center Position".
But with this switch it is now possible to have the
Return-To-Home feature at any given time.
Option 1
► Same procedure as
Basic.
► Set up a second
program.
► Assign the same
channel as the Control Mode switch to this program.
► Choose another two
or three position switch to activate this program.
Set your start position as OFF.
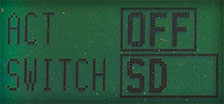
► Start off in MANUAL
mode with your Control Mode switch.
► Choose a linear
curve. Adjust it so the slider moves into the
FAILSAFE zone.
► Test it.
|
When you toggle this
switch the slider should move
into the upper FAILSAFE zone.
|
|

FAILSAFE in MANUAL mode
|
When you're in the second position Control
mode (GPS Attid/Atti) the slider should be in the lower
FAILSAFE zone.
|
|
\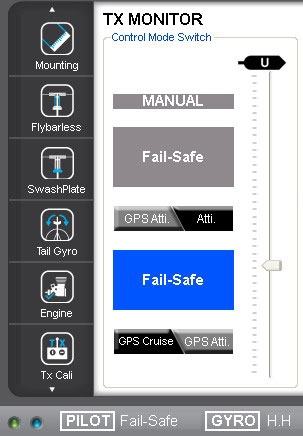
FAILSAFE in GPS Atti/Atti
mode
|
When the switch is in the third
position (GPS Cruise, GPS Atti) the slider should have
moved to the very bottom. This is OK.
Notice the PILOT indicator that it's still in FAILSAFE
mode. Also notice the LED indicators on the
GPS/Compass that it is blinking with the FAILSAFE
colors.
|
|
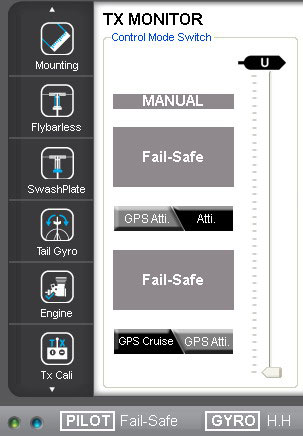
FAILSAFE in GPS Cruise/GPS
Atti mode
|
Failsafe
Switch sample video
Notice
the PILOT indicator in "Fail-Safe"
|
|
|
|
|
Option 2
This is for those
that are not comfortable with the slider moving below
the screen. ;-)
► Same procedure as
Basic.
Enable FINE
TUNING within the program for the Control Mode switch. Assigned another switch (CTRL),
changed mode and changed rate to 100%.

Image from
Futaba 12z manual
When FAILSAFE switch is
activated the values of the end points are changed
causing the AUTOPILOT to enter into its FAILSAFE mode
(zone).
This
switch allows for only two FAILSAFE
positions, indicated with the red
arrows, to be manually activated.;
one in MANUAL mode and the other
in GPS Cruise or GPS Atti mode.
Image below
are the positions of the slider when the FAILSAFE switch
is activated in MANUAL and GPS modes.
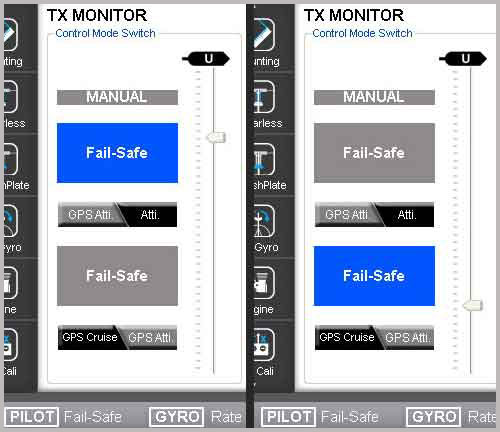
NOTE:
1 - The PILOT status
at the bottom is "Fail-Safe".
Also note the color of the GPS LED status indicators
when in FAILSAFE mode.
2 - Do not forget to
set the FAILSAFE values into your transmitter
as well.
|