|

|
Software Configuration -
Autopilot |
|
|
|
|
 |
|
|
|
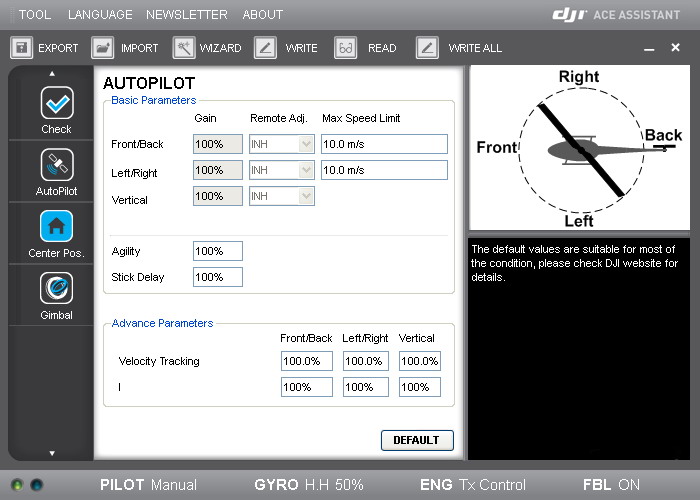
Basic Parameters |
Description |
|
Front/Back, Left/Right |
Range
40%-400%
Slowly
increase by 10% at a time until
the helicopter begins to
oscillate. Then decrease
until oscillation stops.
|
|
Vertical |
Range
50%-250%
Slowly
increase by 10% at a time until
the helicopter begins to jump up
and down. Then decrease
until jumping stops.
|
|
Agility |
Range
50%-200%
This sets the
reaction speed of the helicopter
Set it higher for faster
reaction.
|
|
Stick Delay |
Range
50%-200%
This sets the
overall stick reaction speed.
The smaller the value the faster
the reaction.
|
|
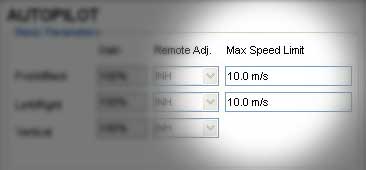
Max Speed Limit |
Front/Back Range 1.0 -
20.0 m/s
Left/Right
Range 1.0 - 15.0 m/s
|
|
Here's a quick reference speed
table
|
Meter / second |
Kilometer / hour |
Mile / hour |
|
1 |
3.6 |
2.24 |
|
2 |
7.2 |
4.48 |
|
3 |
10.8 |
6.72 |
|
4 |
14.4 |
8.96 |
|
5 |
18 |
11.2 |
|
6 |
21.6 |
13.44 |
|
7 |
25.2 |
15.68 |
|
8 |
28.8 |
17.92 |
|
9 |
32.4 |
20.16 |
|
10 |
36 |
22.4 |
|
11 |
39.6 |
24.64 |
|
12 |
43.2 |
26.88 |
|
13 |
46.8 |
29.12 |
|
14 |
50.4 |
31.36 |
|
15 |
54 |
33.6 |
|
16 |
57.6 |
35.84 |
|
17 |
61.2 |
38.08 |
|
18 |
64.8 |
40.32 |
|
19 |
68.4 |
42.56 |
|
20 |
72 |
44.8 |
Download a copy of
this table
here (27 KB)
Printable for quick
reference.
Includes a speed calculator
to convert MPH or KPH to
m/s.
(Enable macros for
calculator to work)
|

In Max Speed Limit field you may enter
decimal values in m/s to
achieve exact speed in KPH or
MPH.
Use the calculator link provided
above to achieve desired speed.
Here's what it looks like.
Type in the speed you want to
fly at and click on either KPH
or MPH.
(Requires MS Excel)

Or you could do it manually.
KPH to m/s: KPH speed
÷
3.6
MPH to m/s: MPH speed
÷
2.24
Remember AceOne has a max m/s
speed of 20.
|
|
|
Advance Parameters |
Description |
|
Velocity Tracking, I |
Velocity
Ranges
Front/Back :
0% - 250%
Left/Right :
0% - 250%
Vertical : 0%
- 140%
I Range :
0% - 500%
As per DJI.
"The default
values are suitable for most of
the condition, please check DJI
website for details."
Here's what I
found in a PDF file called Control Parameter
Set.
See
description below.
|
|
V-Parameter
|
|
|
The V
parameter adjusts the
tendency of motion during
pilot commands. Higher V
values cause the helicopter
attitude to adjust more
aggressively to obey command
input. For instance, when a
stick position command is
given, a high V value causes
the helicopter to have a
relatively sharper angle in
response. This allows the
helicopter to reach the
desired speed sooner, but
sometimes the helicopter
will become unstable and
difficult to control. A low
V value causes the
helicopter to respond slower
to stick position commands,
even with very extreme stick
positions.
One can say that the V
parameter adjusts the
tendency of motions, and the
change of control feeling
after the adjustments will
be similar to the difference
between using hard or soft
rotor head. But V is not the
sole influence on the time
of respond, please note.
The V parameter adjusts the
tendency of motions, and
gain adjusts the feedback
strength of such tendency. V
is adjusted according to
user preference, but gain
has a theoretical best
possible value.
|
|
I-Parameter
|
|
|
The I
parameter corresponds to
consistent and accurate
speed, or steady hovering,
when the helicopter receives
external disturbance. When
the pilot gives a command
through stick position, the
helicopter might not be able
to achieve the desired speed
due to head wind. The larger
the I value, the faster the
helicopter will compensate
and adjust for wind, while
smaller I values may cause
more time for the helicopter
to reach the commanded
speed.
Similarly, when the
helicopter is hovering and
wind blows the helicopter
away from the hover point,
the helicopter will gain a
certain acceleration
proportional to the I value
to return to the hover
point. The larger the I
value, the sooner the
helicopter will make this
adjustment.
When the I value is too low,
the helicopter will drift
within a certain range,
similar to what happens when
a gain parameter is too low.
|
|
|
|

|
|
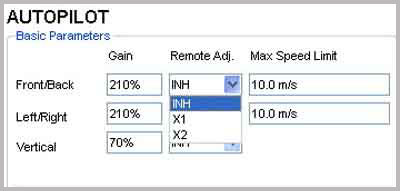
Similar to setting up
Flybarless, assign X1 and X2 to
remotely adjust the gains.
|
|
| |
|
|
|
| |
|
|
NOTE: When you have
optimized the AUTOPILOT
parameters there is no need to
enable the remote adjustment.
Change these back to INH
(Inhibit)
Or click on TOOL >
Disabled All Knob |
|
| |
|
|

From the
manual
|