|
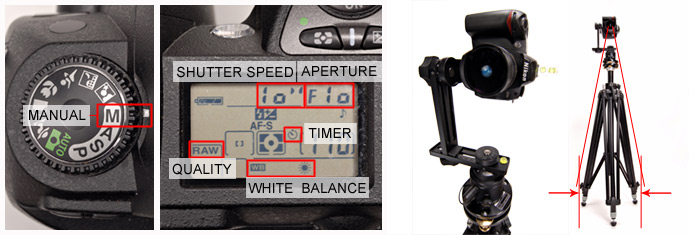
With a DSLR, shoot in
manual mode and set the image quality to RAW.
Adjust the shutter speed, white balance and the desired
aperture.
Set up the VR head and camera on the tripod. With
this specific tripod, notice the footprint has been decreased to
avoid being in the nadir shot. Less editing of the bottom
image later on.
For long night exposures
use a remote shutter release or set the camera on timer release mode
as shown above with the D70s. If you are really worried about
camera shake then you might also want to set your camera on mirror
lock-up.
The VR head should have been previously adjusted to
the camera's entrance pupil.
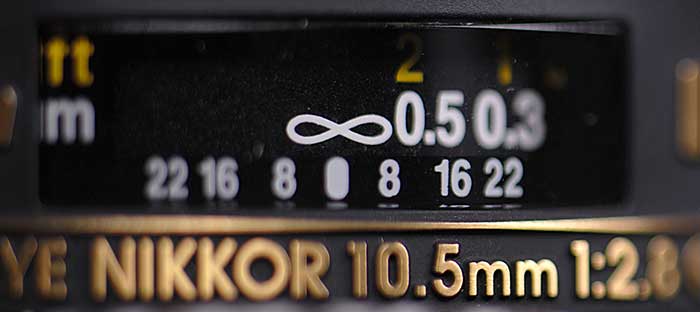
Set the focusing ring to
infinity.
Why choose infinity?
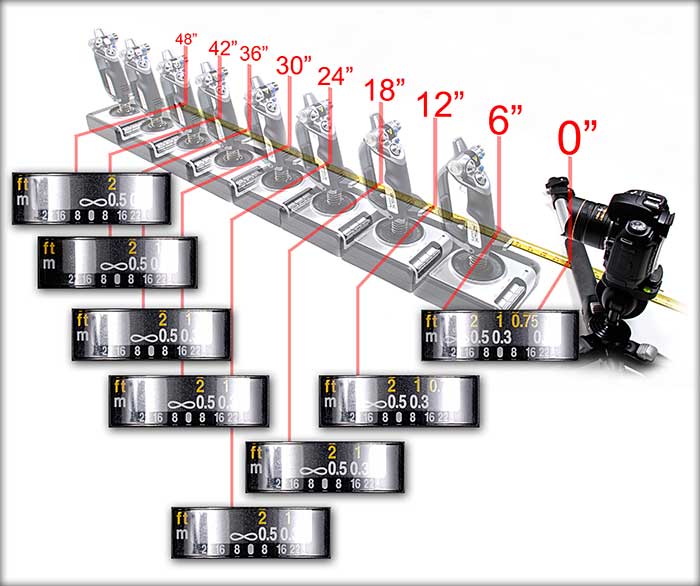
Most shoot at a height between 3
1/2' (42") to 4' (48") or greater. The image below shows the
position of the focusing ring of the Nikkor 10.5mm at various
distances of an object. (Game controller)
You can clearly see that between
42" to 48" the focusing ring is at the infinity position. You
can already guess where the focusing ring will be at when
automatically focused at a greater distance.
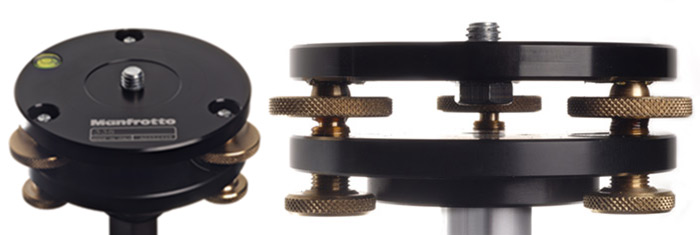
Level
the tripod and/or VR head. There are many leveling devices out
there. Personally I use two. A Manfrotto 338 and 337.
MManfrotto's 338
Leveling Plate on the tripod.
|
|
|
Manfrotto's 337
Double Bubble Level for the hot shoe.
If you wanted to take a
leveled shot, even if your VR head is leveled and with most VR heads (probably all),
there is no visual guide to verify that your camera is leveled after mounting. |
|
|
NOTE
ON BUBBLE LEVELS: You do not need multiple bubble levels. This
is personal preference. I use the 338 Leveling Plate as my
main leveling guide.
I
use the 337 double bubble mainly for the zenith, nadir and hand held
shots. |
Rotational Degree
Increment.
This depends on the lens
that you are using. For a full frame fisheye lens, a pan shot
at every 60° is enough image overlap for a panorama.
Depending on the VR head, some have a rotation base that have adjustable click stops for
accurate divided rotations.
For hand held shots, I
use the 337 to level, lock the "camera" arm against my body, and
visually turn my body at every 45° (Eight pan shots).
|
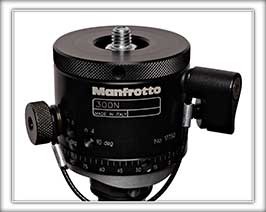
Manfrotto's 303PLUS and 303SPH's
panoramic head, the 300N, have adjustable click-stops that ranges
from 4, 6, 8, 10, 12, 15, 18, 24, 36, and 72 click stops. The
300N can also be used for object panoramas due to its
turntable like qualities.
Below is 300N's
graduated scale and adjustable click-stops in detail.
Pros: Easier to adjust. Cons: Expensive.
Scroll the image below
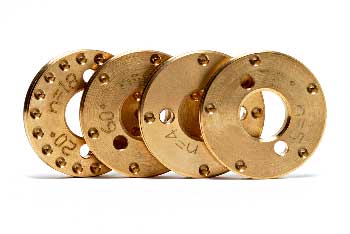
Kaidan's, Nodal
Ninja's and various other VR heads
have interchangeable detent plates/discs/rings. Pros: Cheap. Cons:
If you needed to, changing plates is a bit time consuming, but you
would have prepared this before hand.... right?
Nodal Ninja's detent plates.
These are double sided plates.
|
|